Security Camera Placement Guide: Where to Mount for Real Coverage (2026)
Mount security cameras 7–10 feet high and aim at entry points, not open space. See the placement rules that decide whether your footage is ever useful.
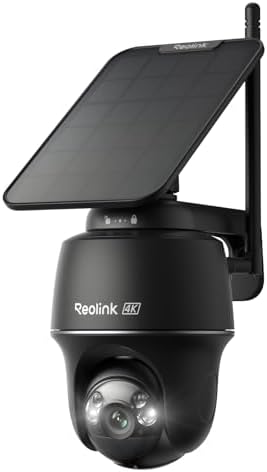
A well-placed 2K camera beats a badly aimed 4K one every time. The difference between footage that identifies someone and footage that shows a blurry hoodie is almost never the camera. It is where you put it and which way it points.
The short answer: mount 7–10 feet high, aim at the paths people must walk rather than the open space they cross, keep a 30–45° angle to doorways so you catch faces, and keep the sun out of the lens. This guide explains each rule, the mistakes that break them, and how to plan a layout before you drill anything.
Independent guide. We may earn a commission from links on this page.
The one rule that matters most
Cameras should watch choke points, not open space. A choke point is somewhere a person must pass: the front door, the driveway apron, the side gate, the path from the street to the porch. An empty lawn is not a choke point, no matter how much of it the camera covers.
The reason is simple arithmetic. Every extra metre of distance costs you face detail, and a person on open grass has dozens of routes. A person at your front door has one. One camera on a choke point outperforms three covering a broad area, and it costs a third as much.
1. Cover choke points, not open space
Start by walking your property the way a stranger would. Where are the unavoidable pinch points?
- Front approach: the point where the path meets the porch, not the porch ceiling.
- Driveway: the apron where a car enters, plus a second angle at the street for plates.
- Side and rear access: any gate or gap wide enough to walk through.
- Ground-floor windows and doors that face away from the street.
Four cameras placed on those points usually beat six scattered for “coverage”. If you are buying a kit, buy for the choke points you actually have, not for a round number of cameras.
2. Mount high enough to avoid tampering — but low enough to ID faces
Height is the single most common mistake. Too low and the camera is easy to knock or cover. Too high and every subject becomes the top of a head.
| Height | What you get |
|---|---|
| Under 6 ft | Faces clear, but easily reached and tampered with |
| 7–8 ft | Best balance for doors and porches |
| 8–10 ft | Good for perimeter and driveway; angle down 15–20° |
| Over 10 ft | Tops of heads; identification value drops sharply |
Aim for 7–8 feet at doors and 8–10 feet on the perimeter, angled slightly downward. The test is straightforward: stand where an intruder would stand, then check the live view on your phone. If you can see a face, the height is right.
3. Use the 30–45° rule for doorways
Mounting a camera directly above a door and pointing it straight down gives you nose, hair and shoulders. It is the classic doorbell-camera mistake.
Offset the camera 30–45° to the side of the door so it looks along the approach path rather than down at it. From that angle a person walking up is seen in profile-to-front as they turn, which is exactly when their face is visible.
If you only have one camera at a door, put it on the side the door opens toward, at about head height plus a foot.
4. Mind the light — and backlight
Backlight is the second most common reason footage is unusable: the camera exposes for the bright background, and the subject becomes a silhouette.
- Avoid aiming east-facing cameras into the sunrise and west-facing ones into the sunset. Both produce a washout window at the times you would most want footage.
- Avoid pointing at reflective surfaces — car windscreens, glass doors, and metal siding all bounce light back into the lens.
- Look for WDR (wide dynamic range) if you cannot avoid a backlit position. A camera with WDR and a modest sensor beats a higher-resolution camera without it in a doorway.
- Use colour night vision or a spotlight where a porch light would help, and check whether your model switches to black-and-white IR at night.
5. Wi-Fi and power decide placement as much as sightlines
The best angle is useless if the camera cannot stay powered and connected. Decide the power plan before the mounting plan.
- Battery cameras: mount where Wi-Fi signal is genuinely strong, and where you can reach the unit to recharge. A solar panel removes most of the charging hassle, but it needs a few hours of direct sun a day.
- PoE (Power over Ethernet) cameras: mount wherever you can run a single Ethernet cable. No charging, no Wi-Fi dropouts, and the most reliable option for a permanent install — see our installation cost guide for what cabling actually costs.
- Plug-in Wi-Fi cameras: convenient but limited to a socket. Fine for a porch, awkward for a back fence.
- Test before you drill: hold the camera roughly in place and check the signal strength and live view from the app. Do this at every position you are considering.
6. Plan for overlap, not perfect coverage
Aim for slight overlap between adjacent cameras. Two cameras covering the same doorway from different angles mean someone who defeats one view is still recorded by the other. A single camera covering everything means a single point of failure.
The classic gap is the “seam” between a front camera and a side camera, where an intruder can walk between the two fields of view. Check for it by walking the route yourself while watching the app.
A placement checklist you can work from
Before you drill anything:
- Walk the property and list your actual choke points.
- Check Wi-Fi signal at each proposed position with the app.
- Confirm power — battery, solar, PoE, or socket.
- Note where the sun rises and sets relative to each camera.
- Check for reflective surfaces in each field of view.
During install:
- Mount at 7–8 ft for doors, 8–10 ft for perimeter.
- Angle doors at 30–45°, not straight down.
- Tilt perimeter cameras down 15–20°.
- Test live view from each position while someone stands at the choke point.
- Seal cable entries so water cannot track in.
After install:
- Set motion zones so passing traffic and trees do not trigger alerts.
- Set privacy zones for any neighbour’s window in frame.
- Confirm night vision actually works before you rely on it.
- Re-check after a week, and again when the season changes.
Common placement mistakes
| Mistake | What it costs you | Fix |
|---|---|---|
| Mounted too high | No face detail, only scalps | Drop to 7–8 ft at doors |
| Aimed at open space | Records nothing of value | Aim at choke points |
| Directly above the door | Nose and hair, not faces | Offset 30–45° |
| Facing the sunrise or sunset | Daily washout window | Re-aim or choose WDR |
| No driveway coverage below car level | No licence plates | Add a low camera at plate height |
| No overlap between cameras | A walkable blind seam | Overlap fields slightly |
| Ignored Wi-Fi before drilling | Dropouts and missed events | Test signal in place first |
When to call a professional
Mounting a camera is genuinely DIY if you are using battery or plug-in models. Hire someone when:
- The run is long and concealed. Fishing cable through a finished wall or attic is where DIY projects stall.
- The position needs mains power. Adding an outdoor socket is licensed electrical work in most places.
- The mount is high or awkward. Ladder work above a certain height is not worth the risk.
- You want a warrantied multi-camera system with an NVR and a single point of support.
For what that typically costs, see our guide to security camera installation cost, and if something is already misbehaving, security camera not working walks through the eight common causes.
Keeping footage useful over time
Placement is not a one-off decision. Revisit it when:
- Trees grow or are removed, changing both sightlines and light.
- The season changes, moving the sun and altering when each camera is backlit.
- You change the layout of the property — a new shed, a parked van, a new fence.
- The firmware or app updates, occasionally resetting motion zones.
A five-minute live-view check each season catches most of it.
Bottom line
Place cameras on choke points, at face height (7–10 ft), angled 30–45° to doors, with no backlight and slight overlap between views. Sort the power and Wi-Fi question before you drill. Then let the app’s motion zones handle the noise.
Position is what makes footage useful. Resolution only matters once the position is right. For the cameras themselves, see our security camera system guide and our wireless outdoor picks.
FAQ
How high should security cameras be mounted? 7–8 feet at doors and porches, 8–10 feet on the perimeter. Above about 10 feet you mostly capture the tops of heads, which is useless for identification.
Should cameras point at the street or at the door? At the door, and at the choke points people must pass. Cameras aimed at open space or the street mainly record passing traffic and neighbours.
Why is my camera footage so bright I cannot see faces? Backlight. The camera is exposing for a bright background such as the sky, a car windscreen, or a reflective surface. Re-aim it or choose a model with wide dynamic range (WDR).
How many cameras do I need? Count your choke points rather than aiming for a round number. Four well-placed cameras usually outperform six scattered for coverage.
Do cameras need to overlap? A slight overlap is worth having. It removes the walkable seam between two fields of view and gives you a second angle on the same doorway.
Can I mount a camera above a door pointing straight down? You can, but you will get hair and shoulders rather than a face. Offset it 30–45° to the side of the door instead.