How to Install a Security Camera (DIY Guide for Wired & Wireless)
Install a security camera yourself in under an hour per camera. See placement, power and storage choices, plus the wiring mistakes that cause most failures.
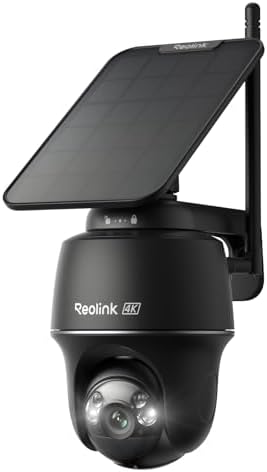
Step by step
- 1
Plan the camera positions first
Walk the property and mark the spots that cover entry points — front door, back door, driveway, side gate. You want choke points, not every wall. Aim for 8–10 feet high, angled slightly down so faces are visible.
- 2
Check Wi-Fi signal at each spot
Stand where the camera will go and check signal strength on your phone. A camera that cannot hold a stable signal will drop recordings regardless of quality. If signal is weak, plan a mesh node or choose a PoE camera instead.
- 3
Confirm power at each location
Battery and solar cameras need no wiring. Plug-in cameras need an outlet within reach. PoE cameras need a single Ethernet cable to a PoE switch or NVR. Decide this before you buy, because it is what determines the whole install.
- 4
Mount the bracket
Hold the bracket against the surface, mark the screw holes, and drill pilot holes. On siding or a wood eave, screws hold well. On brick or stucco, use masonry anchors. Seal any penetration with exterior caulk to keep water out.
- 5
Attach the camera and aim it
Clip or screw the camera onto the bracket. Aim it so it covers the choke point, not open sky or the street. A slight downward angle captures faces better than a level or upward tilt.
- 6
Run cable (wired and PoE only)
For PoE, run one Ethernet cable from the camera to the switch or NVR. Route it along eaves or through an attic where possible. Keep runs under the Ethernet length limit and avoid running parallel to power lines.
- 7
Power on and pair
Insert the battery or connect power, then open the manufacturer app and add the camera. Scan the QR code or follow the pairing steps. Name each camera by location so alerts make sense later.
- 8
Set motion zones and test
In the app, draw motion zones that exclude the street and sidewalk to cut false alerts. Then walk through each zone and confirm the camera records you. Check night vision after dark.
Installing a security camera yourself takes under an hour per camera for wireless models, and the whole job comes down to three decisions: where it goes, how it gets power, and where the video is stored. Get those right and the physical mounting is the easy part.
Before you mount anything
Three checks save hours later:
1. Placement. Cover choke points, not open space. Front door, back door, driveway, and side gate are what matter. One camera on a choke point beats three aimed at empty lawn.
2. Height and angle. Mount at 8–10 feet, angled slightly down. Too high and you get the tops of heads; too low and the camera is easy to tamper with. Avoid mounting directly above a door looking straight down — you get noses, not faces.
3. Wi-Fi and power. Stand where the camera will go and check your phone’s signal. Then decide power: battery/solar (no wiring), plug-in (needs an outlet), or PoE (needs one Ethernet cable). This choice determines the entire install.
Wireless vs. wired: which to install
| Type | Installation | Best for |
|---|---|---|
| Battery / solar | Mount + pair, no wires | Renters, hard-to-reach spots, fast setup |
| Plug-in Wi-Fi | Mount + run to outlet | Continuous recording without cabling |
| PoE | Mount + one Ethernet run each | Whole-home systems, no Wi-Fi dependency |
| Analog (DVR) | Mount + coax + DVR wiring | Replacing an existing legacy system |
Battery and solar cameras are the simplest DIY install — no wiring at all. You trade continuous recording for that convenience; they record on motion and wake from sleep.
PoE is the most capable but the most work: every camera needs a single Ethernet cable that also carries power. If you can route that cable, you get 24/7 recording, no Wi-Fi dependency, and no battery swaps.
Mounting, step by step
The full step list is in the box above. In short: mark and drill pilot holes, mount the bracket, attach and aim the camera, run cable if wired, then pair it in the app.
Two details that matter more than people expect:
- Seal every penetration. A hole in siding or a soffit that is not caulked lets water in and rots the wood. Use exterior-grade caulk.
- Aim after pairing, not before. It is far easier to fine-tune the angle once you can see the live feed on your phone.
Cable routing tips (PoE and wired)
- Route along eaves and through attics where possible — it is faster and protects the cable.
- Keep runs under the Ethernet length limit (about 100 m / 328 ft) or the camera will drop.
- Avoid running parallel to power lines to reduce interference.
- Leave a small service loop at each end so you have slack if the camera is ever repositioned.
App setup: the part that decides whether it is useful
Installing the camera is only half the job. The other half is configuration:
- Name each camera by location (“Front Door”, “Driveway”) so alerts make sense months later.
- Draw motion zones to exclude the street and sidewalk. False alerts from traffic are the number-one complaint, and zones fix most of them.
- Set recording rules — motion-only to save storage, or continuous for critical cameras.
- Turn on notifications selectively. Alerting on every camera breeds alarm fatigue; alert the ones that matter.
- Check night vision after dark, not during the day.
- Update firmware through the app; cameras often ship with older versions.
Testing before you rely on it
- Walk through each motion zone and confirm the camera records you.
- Check the footage — is the face identifiable, or just a silhouette?
- Test at night with and without porch lights.
- Reboot the camera and confirm it reconnects on its own.
- Verify remote viewing works from outside your home network.
Do you need a professional?
Hire one when:
- Cable must be run inside finished walls or masonry.
- The mounting point is high or dangerous to reach.
- You want a multi-camera NVR system configured and warrantied as a whole.
Otherwise, the DIY route saves the entire labor line — which, for wired installs, is often the largest part of the bill.
Storage: local vs. cloud
Before you buy, decide where video lives:
- microSD in the camera — cheapest, no monthly fee, one card per camera.
- NVR — one recorder for many cameras, no subscription, larger storage.
- Cloud subscription — convenient remote access, but a recurring cost.
For most homes, local recording with no monthly fee is sufficient. Ask before buying whether the camera supports it.
Avoid these common mistakes
These are the errors that turn a simple install into a frustrating one.
Mounting too high. The single most common mistake. A camera at 15 feet captures the tops of heads. Keep it at 8–10 feet.
Aiming at the street. Recording the road captures neighbors and passing cars, not intruders at your door. Point at your own choke points.
Skipping the Wi-Fi check. A camera with weak signal drops recordings silently. Test before you drill.
Not sealing penetrations. An unsealed hole lets water into the wall. Exterior caulk is a two-dollar fix that prevents a thousand-dollar repair.
Alert fatigue. Turning on notifications for every camera means you stop reading them. Alert only the cameras that matter.
Ignoring firmware. Cameras ship with outdated firmware more often than not. Update once after pairing.
Assuming you need a subscription. Many people pay monthly for cloud storage they do not need. Local microSD or NVR recording is free and private.
How many cameras do you need?
Coverage, not camera count, is the goal. A practical minimum:
| Home | Cameras | Coverage |
|---|---|---|
| Apartment | 1–2 | Front door, entry |
| Small house | 2–3 | Front door, back door, driveway |
| Typical single-family | 4 | Front, back, driveway, side gate |
| Larger / corner lot | 6+ | All entries plus garage and perimeter |
Start with the doors, add the driveway, then fill in the perimeter. Two well-placed cameras beat four pointed at nothing.
Do you need a professional?
Hire one when:
- Cable must go inside finished walls or masonry. This is where DIY gets genuinely hard.
- The mounting point is high or dangerous — multi-story walls, steep roofs.
- You want a multi-camera NVR system wired and configured as a package.
- You want the install warrantied as a complete system.
Otherwise, DIY saves the entire labor line — which for wired systems is often the biggest part of the bill.
Ongoing care
- Clean the lens every few months; dust and spiderwebs cause foggy night footage.
- Check the app monthly for offline cameras — a camera that silently died is worse than none.
- Replace batteries on schedule for battery models, or add a solar panel to stop thinking about it.
- Review motion zones seasonally as trees grow and blocking changes.
- Check storage is not full; a full microSD stops recording.
FAQ
Do I need Wi-Fi for a security camera? Not always. PoE cameras run on a wired Ethernet cable and can record locally with no Wi-Fi at all. Battery and plug-in cameras generally use Wi-Fi for alerts and remote viewing.
Can I mix wireless and wired cameras? Yes, and it is often smart: wireless where cable is impractical, wired where you want continuous recording. Most apps manage both in one place.
How do I power a camera with no outlet nearby? A battery or solar camera is the simplest answer. Alternatively, a PoE camera solves it with a single Ethernet cable that also carries power.
What is the best height for a security camera? About 8–10 feet, angled slightly downward. High enough to resist tampering, low enough to capture faces.
Do security cameras work in the rain and cold? Outdoor-rated cameras are designed for weather, but check the operating temperature range for extreme climates and confirm the IP rating (IP65 or better for exposed locations).
Will my camera see at night? Most have infrared night vision, and many add color night vision with a spotlight. Check the range — cheap cameras may only see a few feet in total darkness.
Recommended equipment
Frequently asked questions
Can I install security cameras myself?
Yes. Battery, solar, and plug-in Wi-Fi cameras are designed for DIY installation and need no wiring — most take under an hour per camera. Wired and PoE cameras are also DIY-friendly if you can route Ethernet cable; professional help is worth it only when cable must go through finished walls or masonry.
Where should I mount security cameras?
Cover choke points — the front door, back door, driveway, and side gate — rather than trying to watch everything. Mount at roughly 8–10 feet, angled slightly down, so the camera captures faces rather than the tops of heads.
Do security cameras need Wi-Fi?
Wi-Fi cameras do, but not all cameras do. PoE cameras connect over a wired Ethernet cable and can record locally to an NVR without any Wi-Fi. Battery cameras usually use Wi-Fi to send alerts. Always check signal strength at the mounting spot before committing.
How do I stop false motion alerts?
Set motion zones in the app to exclude the street, sidewalk, and swaying trees. Most false alerts come from traffic and foliage, and zone settings eliminate the majority of them without losing real events.
Do I need a subscription for a security camera?
No. Many cameras record locally to a microSD card or an NVR with no monthly fee. A subscription only buys cloud storage and some AI features. For most homes, local recording is enough.