Robot Vacuum Keeps Stopping? 10 Causes and How to Fix Them
A robot vacuum that keeps stopping is usually reporting a stuck wheel or brush, a dirty sensor, or a low battery. Read the error code first — here is how.
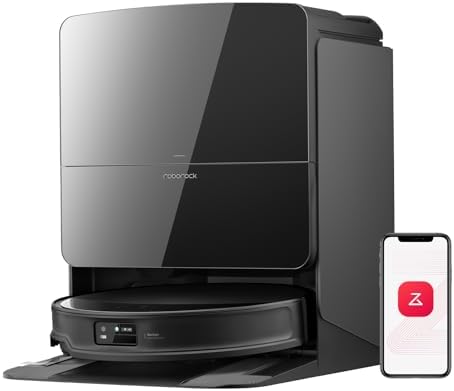
A robot vacuum that halts every few minutes is usually reporting a problem it cannot solve itself. Work down this list — it is ordered from the most common cause to the rarest.
Independent troubleshooting guide. We may earn a commission from links on this page.
1. Hair wrapped around the wheels (most common)
Long hair winds around the drive wheels until they stall. Flip the robot over, cut the hair out, and spin each wheel by hand — it should turn freely.
2. A stuck or clogged main brush
A jammed brush triggers the same “stopped” beep. Remove the brush, clear the ends, and check the end caps for hair.
3. Full dustbin or blocked filter
A saturated filter chokes airflow; the robot may stop to protect the motor. Tap the filter, rinse if washable, and let it dry completely before refitting.
4. Dirty sensors or LiDAR
Dust on the bumper sensors or the LiDAR turret makes the robot think it is trapped. Wipe them with a dry cloth.
5. Cliff sensors on dark floors
Dark rugs or black thresholds can read as a “cliff,” so the robot refuses to proceed. Tape over the cliff sensors or set a no-go zone.
6. Thick or fringed carpet
High-pile or tasselled rugs can stall the drive. Set a no-go zone around them.
7. A stuck wheel off the ground
Cables, rug edges, or a slow descend off a step can leave a wheel spinning in air. Clear cords and add a threshold strip.
8. Low battery / worn battery
If it stops in the same spot every time after the same duration, the battery may be near end-of-life. Check the battery health in the app.
9. Wi-Fi / app disconnect
If it stops and the app shows “offline,” the schedule may be failing on a weak signal. Move the dock closer to the router.
10. Firmware glitches
A rare but real cause. Power-cycle the robot (hold the power button 10s) and update firmware in the app.
The fastest way to diagnose
Open the app and read the error message — most models name the exact fault (wheel stuck, brush jammed, bin full). Nine times out of ten the fix is physical cleaning, not repair.
If your robot stops because it genuinely cannot handle your home, the limit is usually navigation or suction. See our self-emptying picks for models that handle larger, more complex spaces.
A quick checklist to work from
Rather than trying to remember everything, use this checklist when you set things up.
Before you start:
- Measure and mark positions.
- Check signal strength (Wi-Fi) or power access at each spot.
- Gather the tools and parts you need.
- Photograph or note the current setup before changing anything.
During setup:
- Mount or configure in the planned position.
- Aim, angle, or calibrate for real-world conditions.
- Test with the door open, the room occupied, or the system running.
- Seal or secure anything that could loosen over time.
After setup:
- Confirm it works under real conditions, not just on the bench.
- Set any zones, schedules, or alerts.
- Write down what you changed, so you can undo it.
- Re-check after a week for anything that has drifted.
Working from a checklist prevents the two most common failures: skipping the pre-check and forgetting to test in real conditions.
Common mistakes and how to avoid them
| Mistake | Consequence | Prevention |
|---|---|---|
| Skipping the pre-check | Wrong position, wasted effort | Measure first |
| Testing on the bench only | Works in theory, fails in practice | Test in real conditions |
| Overtightening or over-sealing | Damage, hard to adjust later | Firm, not forced |
| No no-go zones / limits set | Repeated problems | Configure limits early |
| No maintenance rhythm | Silent decline | Set a schedule |
| Not documenting changes | Cannot troubleshoot later | Note what you changed |
When to call a professional
DIY covers far more than most people assume. Hire help when:
- Line voltage or gas is involved (electrical, refrigerant, gas lines).
- Access is dangerous — high, steep, or confined spaces.
- The work must be warrantied as part of a larger system.
- You have tried the obvious fixes and the problem persists.
- The cost of a mistake exceeds the cost of the professional visit.
Knowing when to stop is a skill. The money saved on a job you can do is real; the money lost on a job you should not have attempted is larger.
Maintenance that prevents repeat problems
Most issues recur only when maintenance is skipped:
- Follow a simple monthly and seasonal schedule.
- Clean and inspect the parts that fail most often.
- Replace consumables on schedule, not after failure.
- Document what you did and when — it makes diagnosis much faster later.
- Re-check after weather or seasonal changes, which change conditions.
FAQ
How long does this take? Most DIY setups take 30 minutes to a couple of hours, depending on scope. Professional installation varies from a single visit to several days for larger systems.
Do I need special tools? Usually a basic toolkit plus the parts and any specific item the job calls for. Anything involving line voltage or refrigerant needs a professional.
Can I do this myself? For most of the guidance on this page, yes. The exceptions are clearly noted where professional work is required.
What if I get stuck? Re-check the setup against the checklist, then consult a professional if you have covered the common causes. Most problems have a simple, known fix.
How often should I re-check? At least seasonally, and after any change to the environment — weather, layout, or equipment.